Navigation menu
hello Guest

Instructor Manual
Side Panel
You can organize multiple courses in your library with the help of side panel. It comprises of pre-defined groups:
So, if you have multiple courses in your library you can easily manage it under these categories. You can even create custom groups to organize it further.
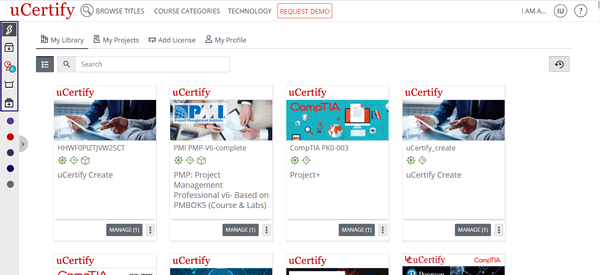
Figure 1.1: My Library Page with Pre-Defined Groups
Go to your My Library and click the Add group button.
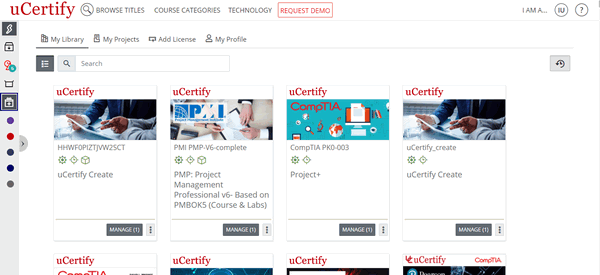
Figure 1.2: My Library Page with Add group button
Enter the name for the group of courses, which you want to create. Pick a color to identify your group and select the required courses for your group. Finally, click the Add button to create the group.
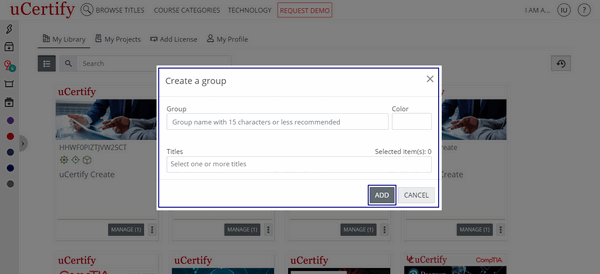
Figure 1.3: Create a group Modal Box with Add Button
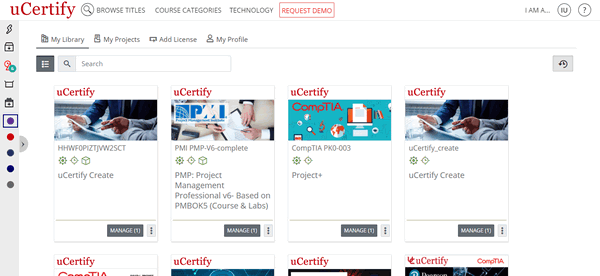
Figure 1.4: My Library Page with Course Group
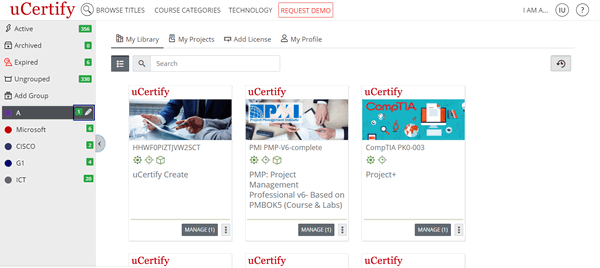
Figure 1.5: My Library Page with Edit Course Group Option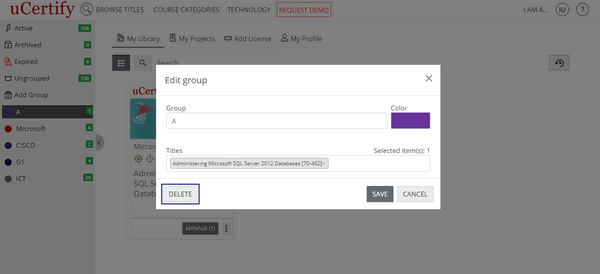
Figure 1.6: Edit Group Modal Box with Delete Button
So, if you have multiple courses in your library you can easily manage it under these categories. You can even create custom groups to organize it further.
Figure 1.1: My Library Page with Pre-Defined Groups
Go to your My Library and click the Add group button.
Figure 1.2: My Library Page with Add group button
Enter the name for the group of courses, which you want to create. Pick a color to identify your group and select the required courses for your group. Finally, click the Add button to create the group.
Figure 1.3: Create a group Modal Box with Add Button
Figure 1.4: My Library Page with Course Group
Figure 1.5: My Library Page with Edit Course Group Option
Figure 1.6: Edit Group Modal Box with Delete Button